...
Create an empty Map, however, if f you already have a map with layers, it can be used as well.
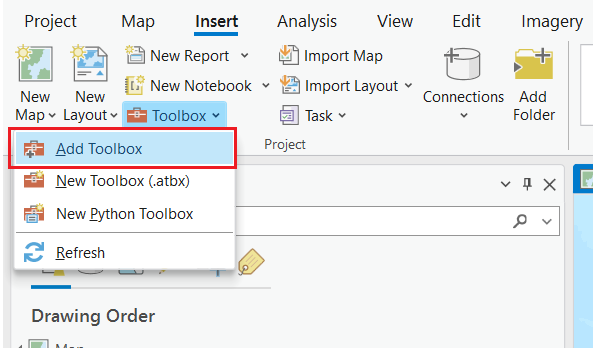
Add a Toolbox
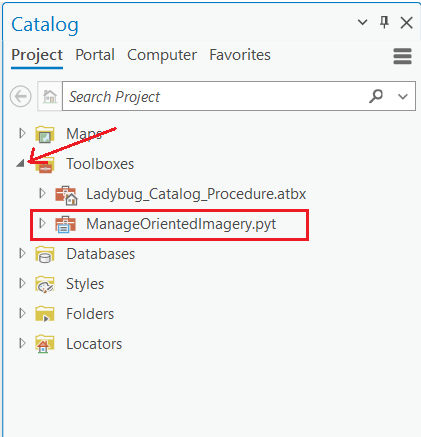
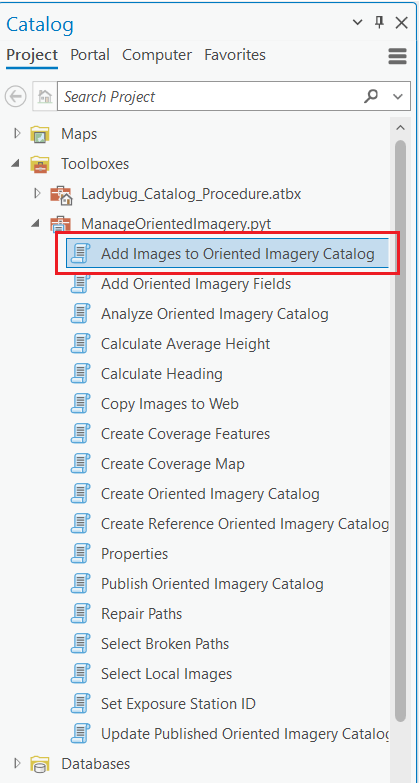
Select the Oriented Imagery ToolBox
Activate Catalog Pane
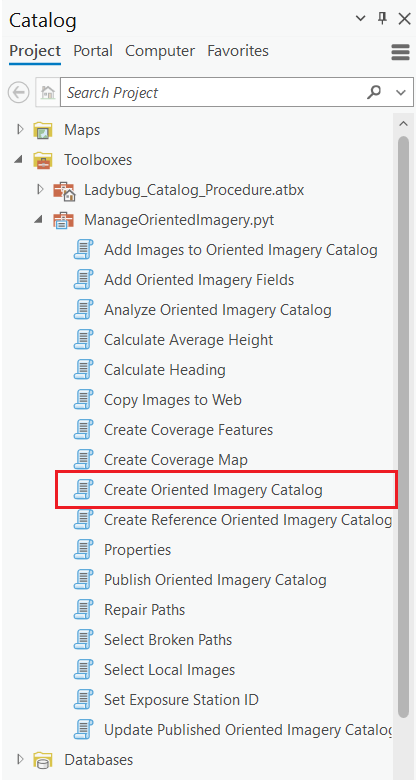
Open the recetly recently added toolbox
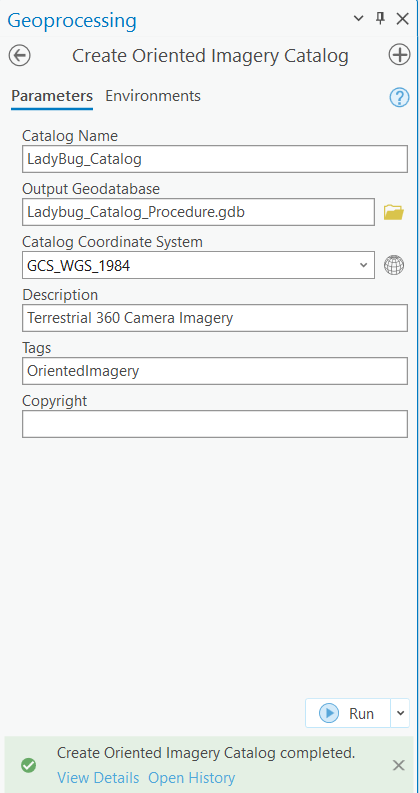
Click on Create Oriented Imagery Catalog
Populate the relevant fields. Make sure the Catalog Coordinate System matches the one used in the Frame Table.
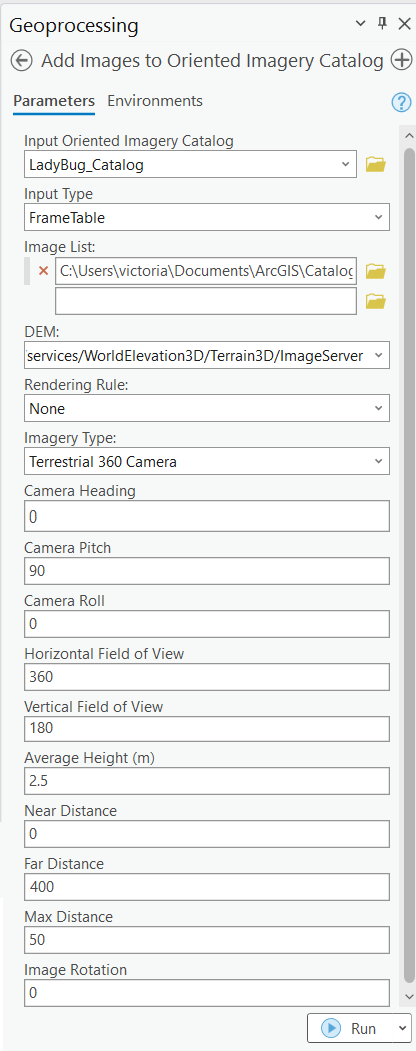
Add Images to the Oriented Imagery Catalog
Make sure all relevant fields are incliudedincluded.
Input Type is set to Frame table and used the one created in the previus previous steps.
DEM must be WorldElevation3D.
Imagery Type: Terrestrial 360 Camera
Average Height value should be within the values in the FrameTable. However, since the frame table has values in it, ArcGIS will pull the values from there instead.
Near Distance and Far Distance are relevant for the way the image is displayed.
The ESRI OIC and AerialSphere Multi-OIC widgets use these values to control the size and width of the red polygon that shows the usable distance from the camera position.
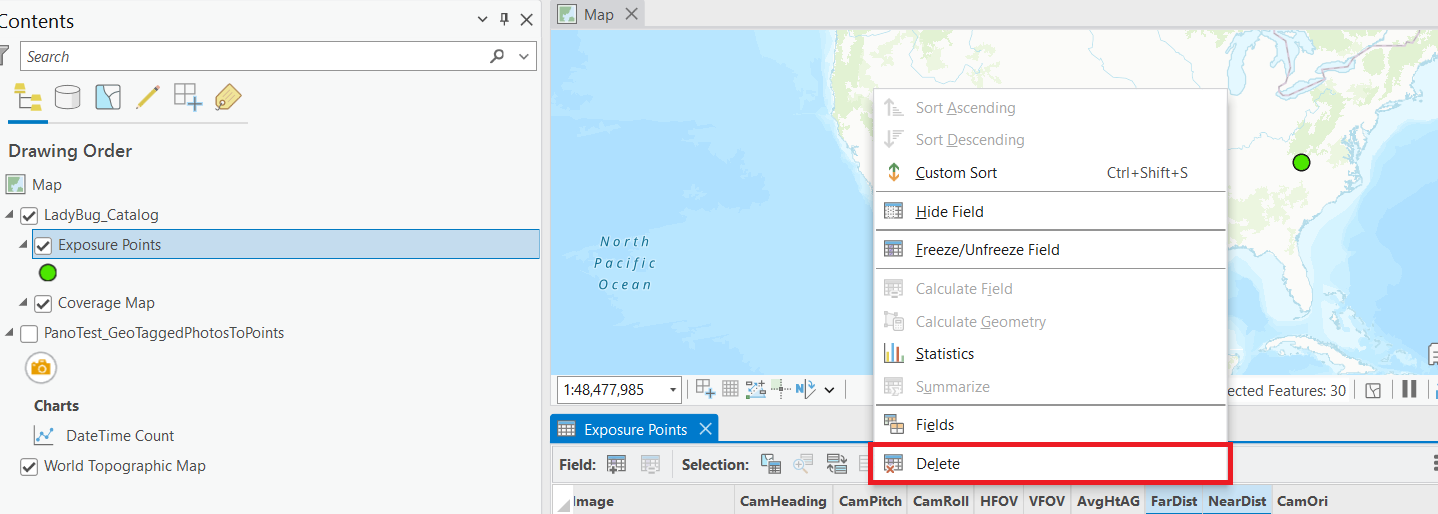
For the AerialSphere 3D Viewer widget, leaving these values in the Exposure Points feature layer can interfere with how the 360 image is displayed in the Map Widget., then they will be removed from the Exposure points once the catalog is generated.Max Distance—leave the default value
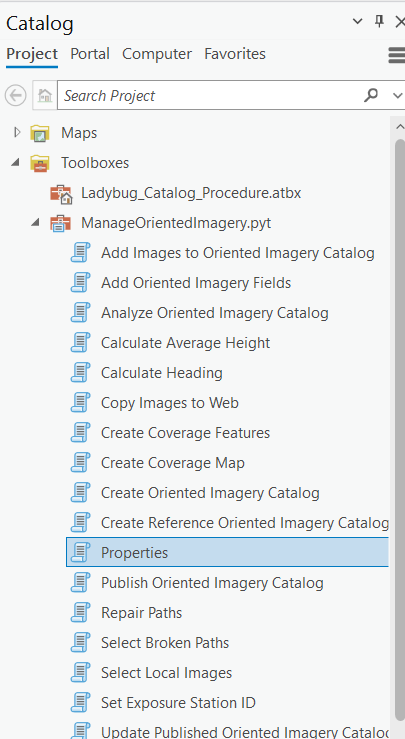
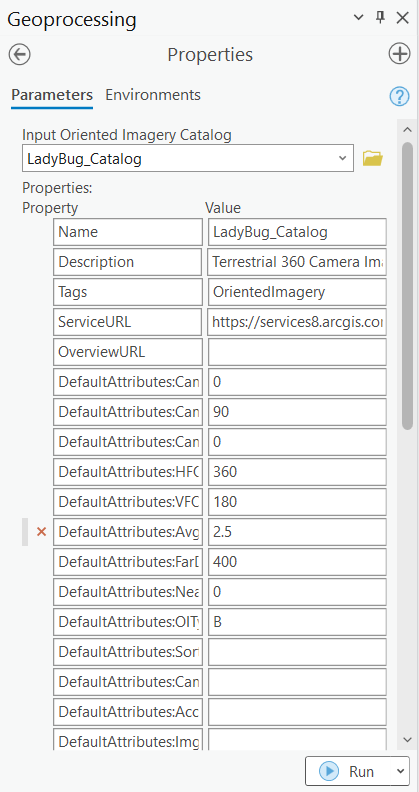
Select Properties
Make sure all relevant properties are indicated
If the Catalog will be used in the AerialSphere 3D Viewer Widget, delete the NearDist and FarDist fields from the Exposure Points feature layer.
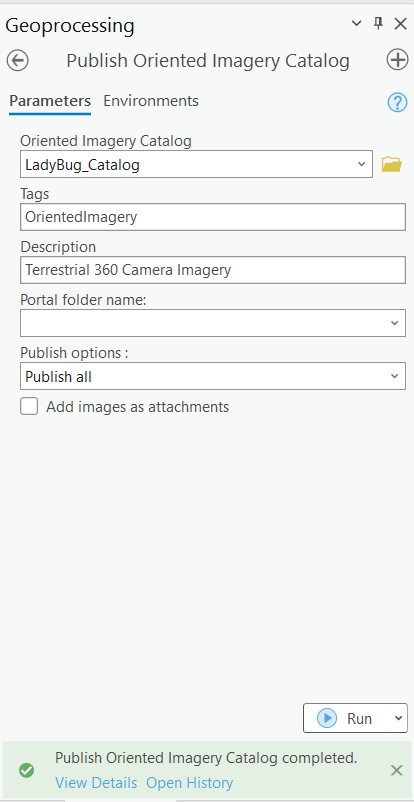
Publish the Oriented Imagery Catalog
...
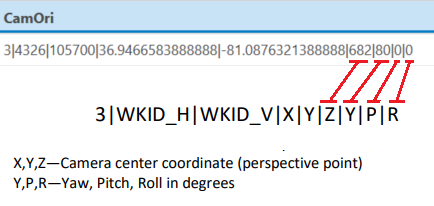
When using the AerialSphere 3D Viewer Widget in Experience Builder, the image might not align correctly with the elements in the selected Scene. Adjusting some CamOri field data values can improve the alignement alignment between the 360 Image and the elements in the selected Scene.
...
