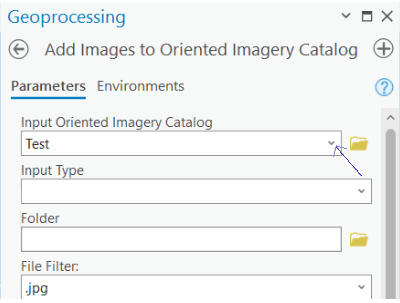
Start ArcGIS Pro, and select the Oriented Imagery Catalog to which we will append images
Click Toolbox > Add Toolbox and navigate to the location where you installed the Oriented Imagery GP tools, select ManageOrientedImagery.pyt, and click OK.
From the Catalog pane, expand Toolboxes, then expand the ManageOrientedImagery.pyt toolbox you just added. You'll see a list of tools for creating and managing OICs.
Under the ManageOrientedImagery toolbox, double-click the Add Images to Oriented Imagery Catalog GP tool.
Complete the dialog by choosing the appropriate Imagery Type. In the field Input Oriented Imagery Catalog, select the catalog to that you want to add images
Select one of the options from the field Input Type, according to the type of file.
Complete the dialog by choosing the appropriate Imagery Type
Click Run.
Once complete, you'll see additional exposure points on the map. Also, you can check the Attribute Table of the Exposure Points and you should see the additional rows corresponding to the data from the appended images.
...
10. Publish your OIC to ArcGIS Online or your ArcGIS Enterprise portal. Under the ManageOrientedImagery toolbox, double-click the Publish Oriented Imagery Catalog GP tool.
...
